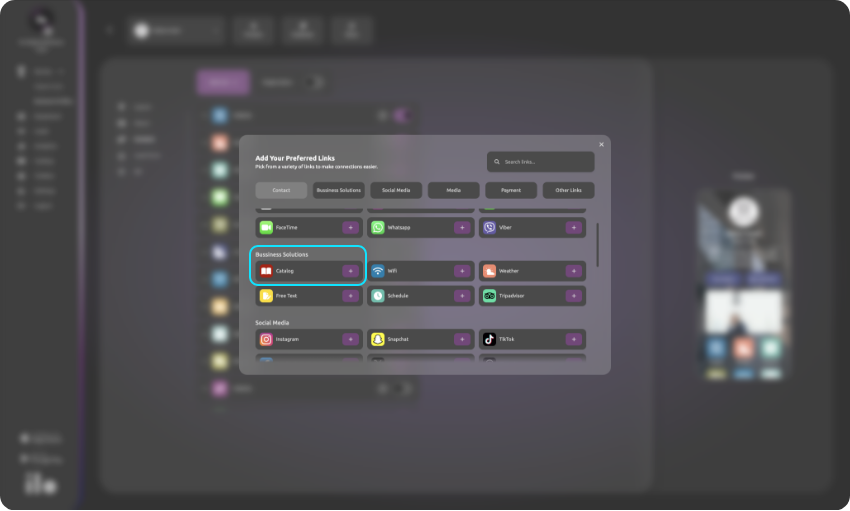
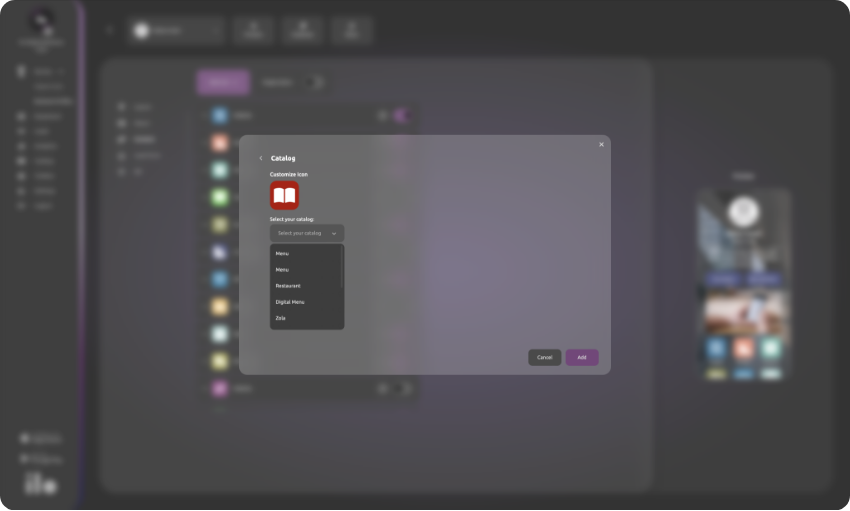
In the navigation menu, you choose the subcategory of Catalogs. From there, you can create your catalog. Click the create catalog button. You can choose between 5 types of catalogs: basic, HORECA, Restaurant, eCommerce, and Services.
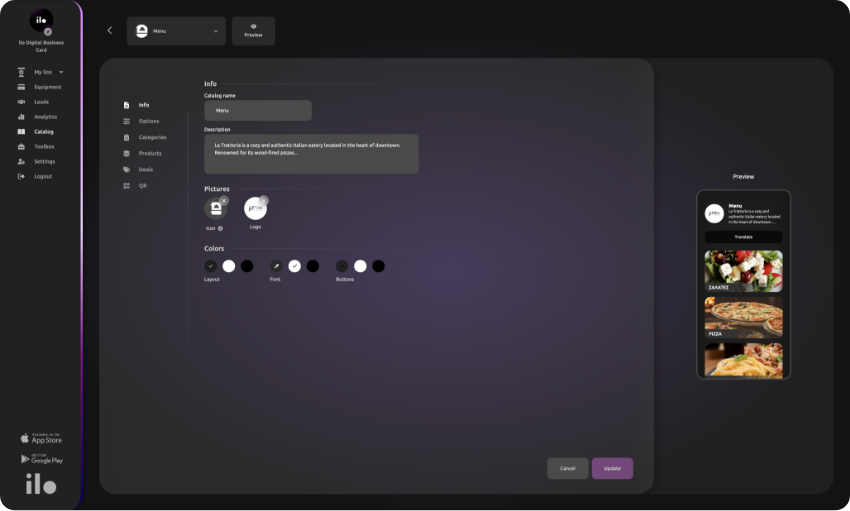
On the “info” subpage, you give your catalog a name and a description. In the catalog icon section, you upload the icon that will represent the catalog within your profile. This could be a photo of your own or an icon from ilo’s library. In the logo section, you upload your business’s logo. With the layout color option, you choose the color of your catalog elements, with the font color option, the color of your fonts, and with the button color option, the color of the buttons for translation and reviews, which you will see later.
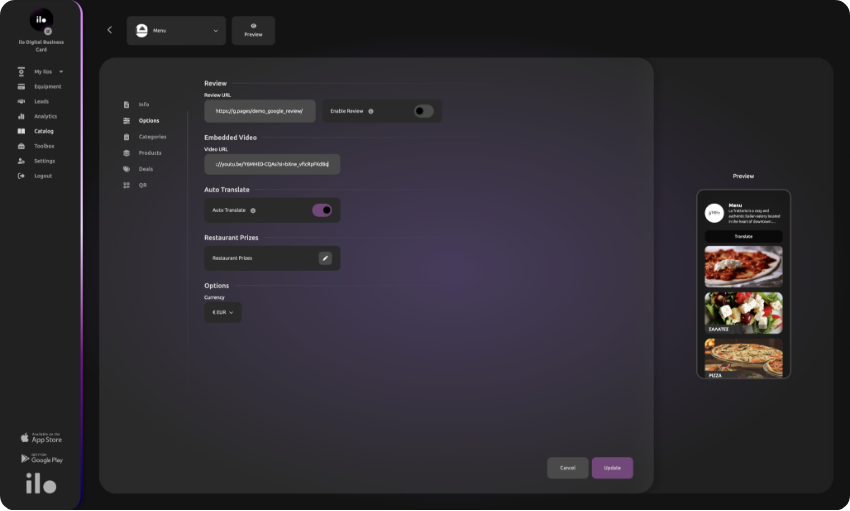
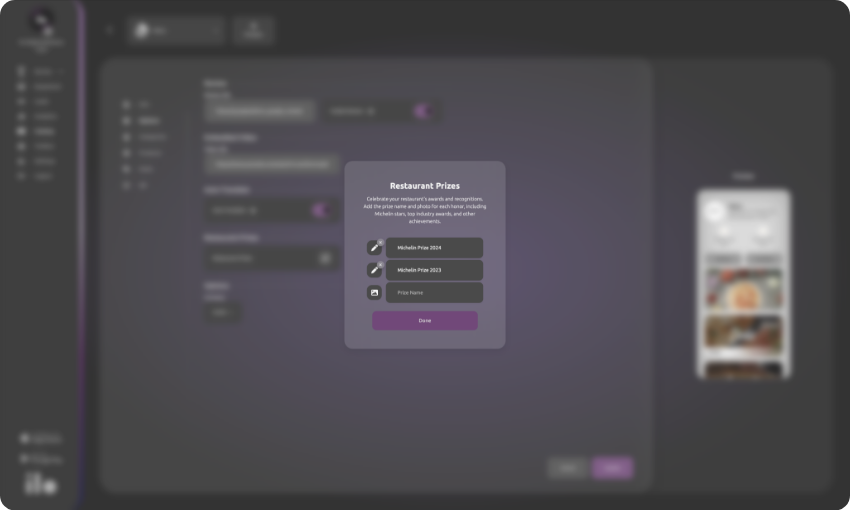
Next, you go to the “Options” subpage. The first element you see is the reviews button. By enabling it, you can add the link to your Google reviews (or any other platform), so customers can rate your business at any time. Below, you can add some additional elements such as an embedded video, auto-translate, which allows visitors to view the catalog in their preferred language, some Restaurant Prizes, and the currency you want the prices to be displayed in within your catalog.
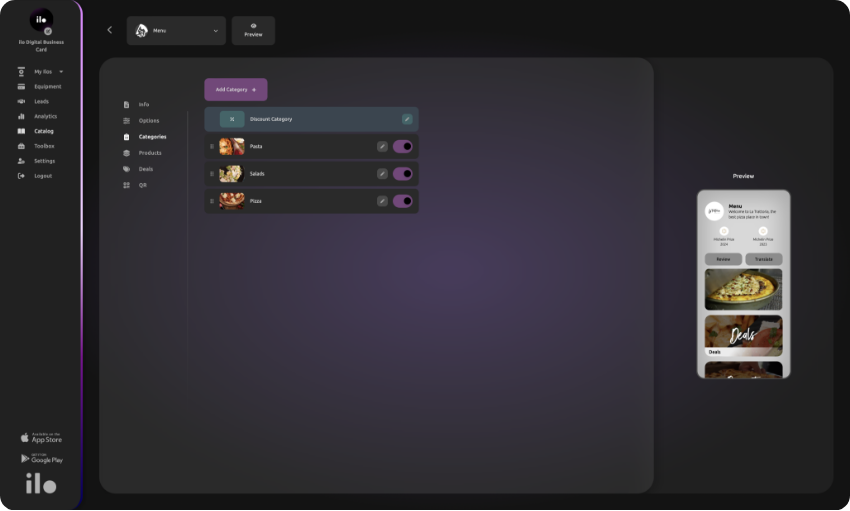
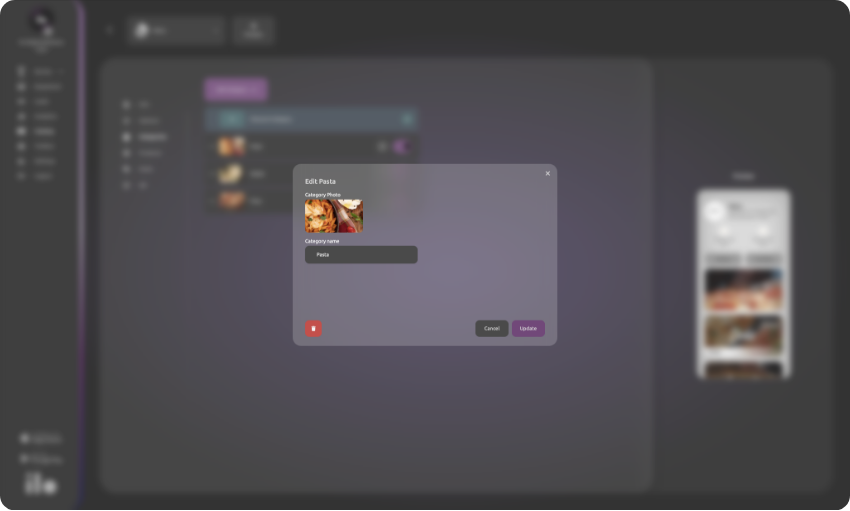
On the “Categories” subpage, you can create categories where you will place your products. Click Add Category. You give your category a name and upload the photo you want to represent it. You can create as many categories as you want. Once you have set up all your categories, you can choose the order in which they appear. You can enable or disable a category without losing the information you have added. Lastly, there is a pre-set category for discounts. Here, all products with assigned discounts will be placed if you choose to do so, as you will see later.
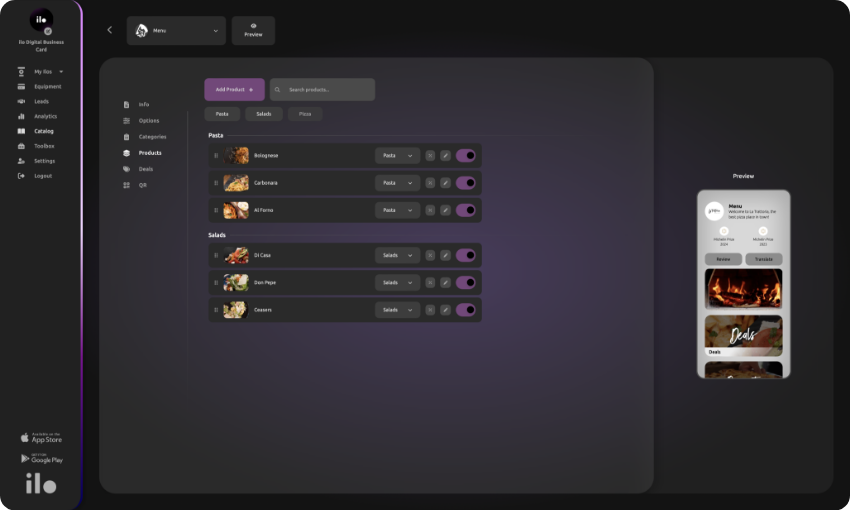
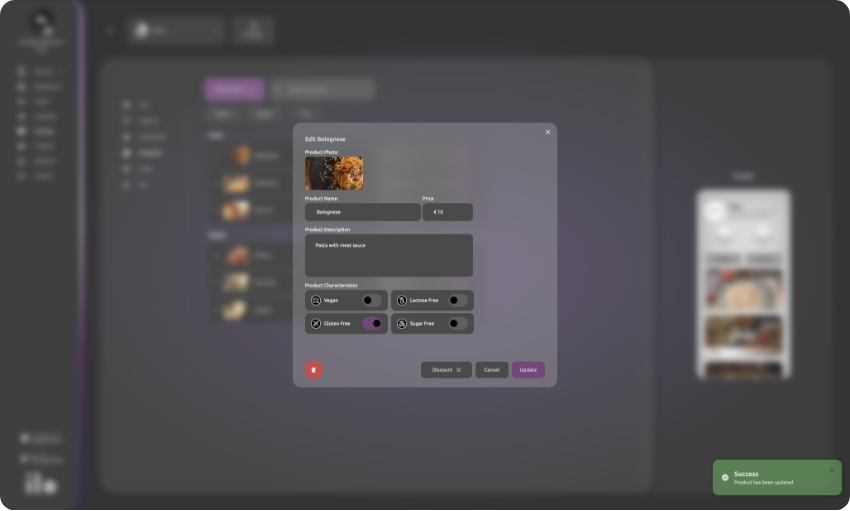
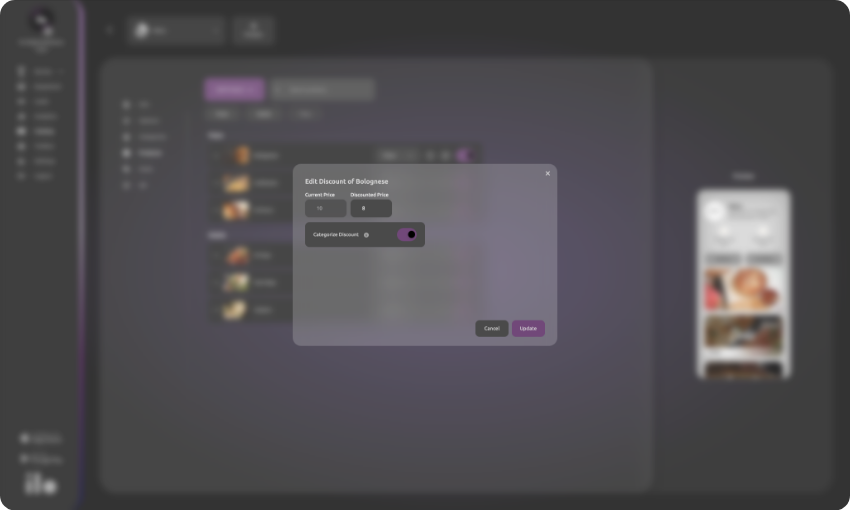
On the “Products” subpage, you can add your products and assign them to the desired categories. Click the add product button. You upload a photo of your product, give it a name, add the price, and a brief description. You can also add some additional information about the product’s nutritional facts, such as being gluten-free. Then, you link it to one of the categories you created. Click Add Product. Once you have added a product, you have the option to set a discount. By clicking either the discount button or the edit button, a modal window opens where you can set the original price and the discounted price. You can also place the discounted product in the “discounts” category, which always appears first, to make it more visible to your customers. Lastly, you can enable or disable a product without losing the information you have added.
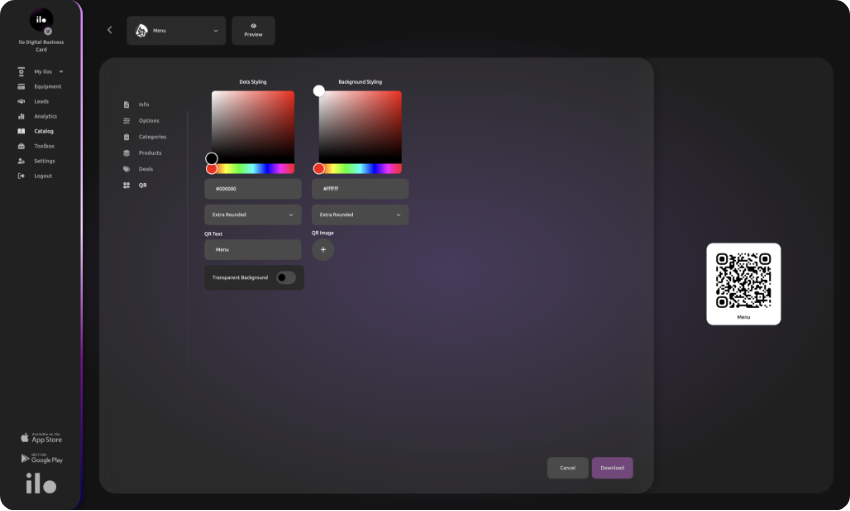
Next, you can edit how the QR code for your catalog will look. Important note: this QR code is independent of your profile’s QR code. Choose the colors, the shape, add a text you want to accompany it, and optionally add an image in the center. You can download it either as a .png for immediate use or as an .svg to forward to a graphic designer.
The last step is to link the catalog you just created to one of your profiles. Click on “my ilos,” go to the “business profile,” and select the profile you want. Go to “content,” click “add content,” and find the link to the catalog. A new tab will open where you can select the catalog you want to link to this profile. Click Add Catalog, and you will see it appear in the live preview.